
Appearance
Send your first invoice
This is the shortest path from a brand-new copy of KiraKira+ to an invoice you can hand to a customer. About ten minutes, five steps.
Do the setup first
A new workspace carries a demo company name. Work through What you must set up first before you send anything to a real customer — otherwise your invoice goes out with the wrong business on it, and a finalised invoice keeps the details it was issued with.
Just trying KiraKira+ out? Carry on — nothing here leaves your computer.
1. Create your workspace
When you open KiraKira+ for the first time you are asked what to work on.
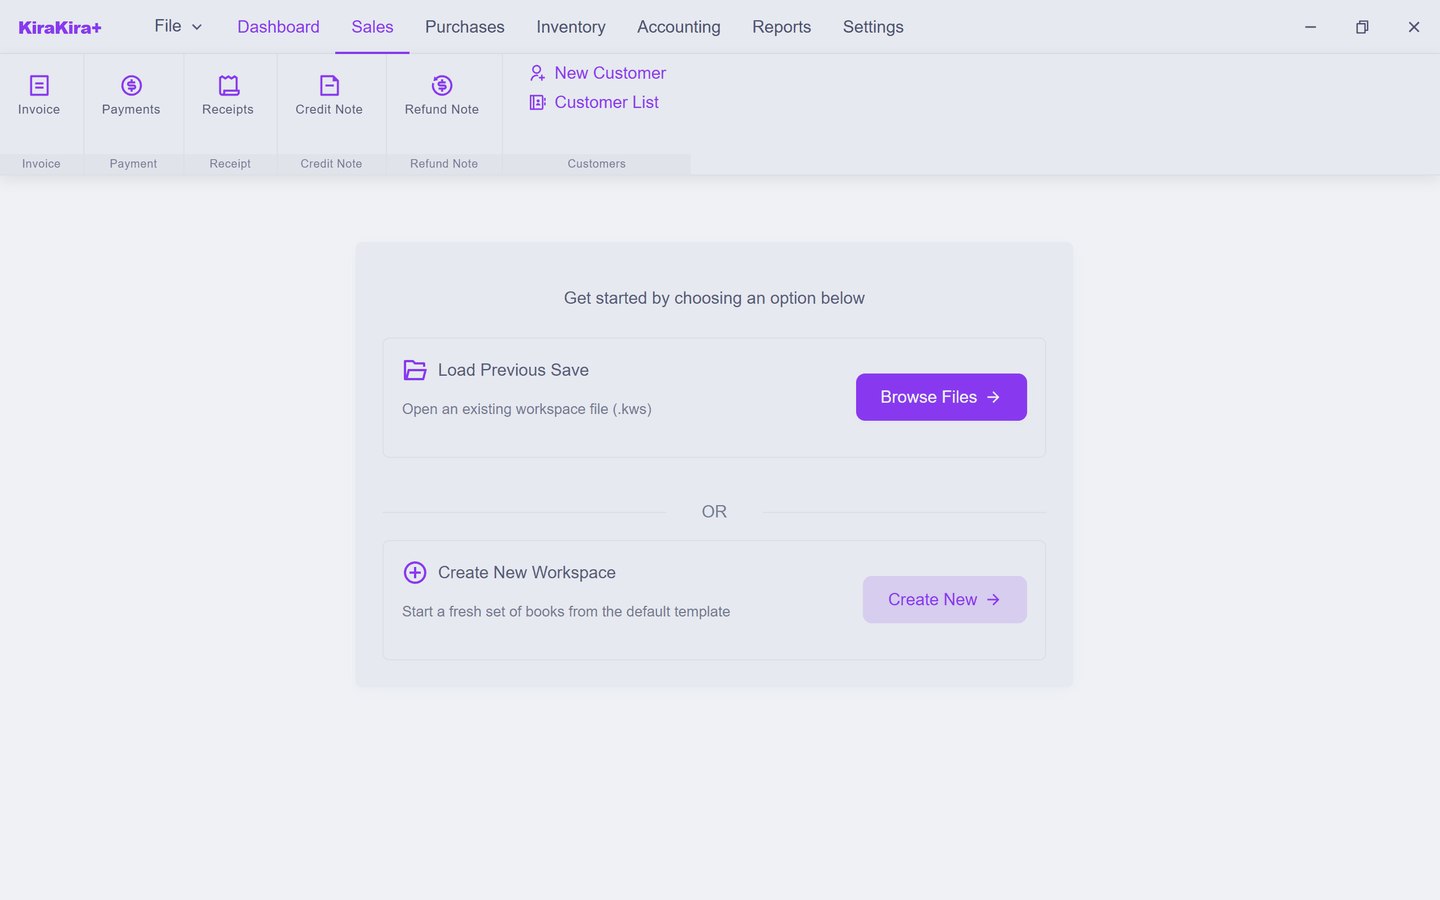
Choose Create New to start a fresh set of books. KiraKira+ builds a standard chart of accounts for a trading business, so you can start invoicing straight away and tidy up the details later.
You land on the Dashboard — the home screen that shows who owes you money and what you owe others. Both are empty for now.
Your books live in one file
Nothing is saved to disk until you save. Use File → Save and pick a folder you back up. The file has a .kws ending — that single file is your accounts.
2. Add what you sell
Before you can put a priced line on an invoice, KiraKira+ needs to know what you are selling. This keeps your reports meaningful: every sale is tied to a product or service.
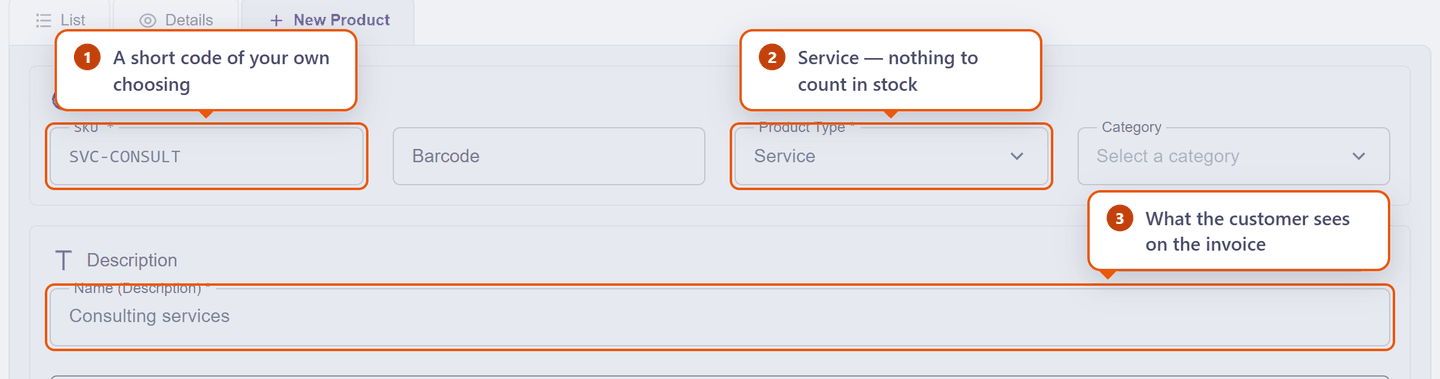
Go to Inventory → New Product and fill in four things:
| Field | What to put | Example |
|---|---|---|
| SKU | A short code, your own choice | SVC-CONSULT |
| Product Type | Service if there is no stock to count | Service |
| Name (Description) | What the customer should see on the invoice | Consulting services |
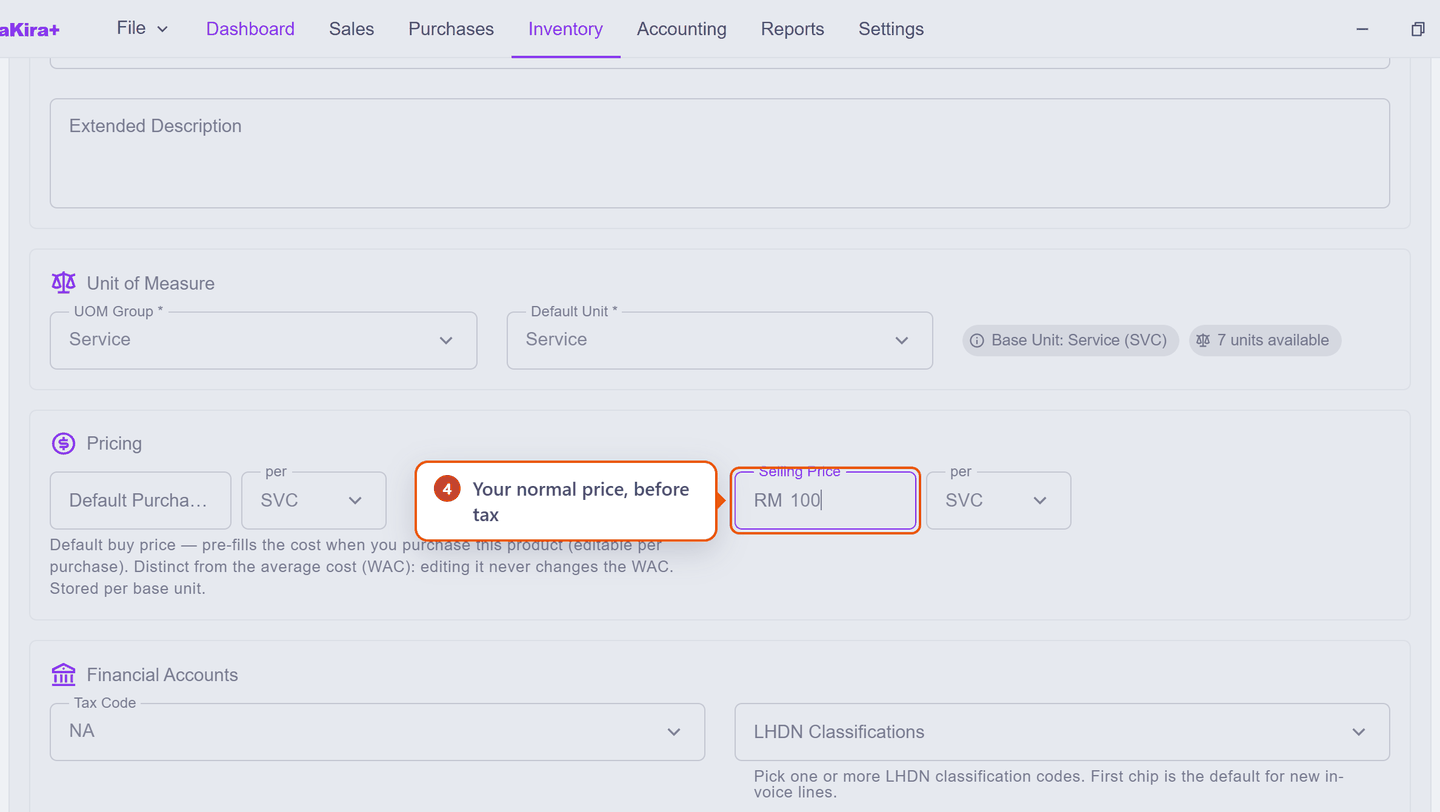
| Selling Price | Your normal price, before tax | 100 |
Scroll down to Pricing and put in what you charge.
Save with the save button at the bottom right. That is your catalogue started — add the rest of your products whenever you like.
Selling something one-off?
You do not need a product for every odd job. Your books come with a Generic Service item: put that on the line and type whatever description and price you want. See Products and services.
3. Create the invoice
Go to Sales → Invoice. The New Invoice tab opens a blank document.
Who is it for? Next to Bill To there is a Contact switch:
- Yes — pick a customer you have saved before (their address and tax details fill in automatically).
- No — a walk-in sale. Just type the customer's name.
For now choose No and type a name, so you do not have to set up a customer record yet.
What are you selling? On the first line of the items table, click the small pencil button to open the line editor, type part of your product name, and pick it from the list.
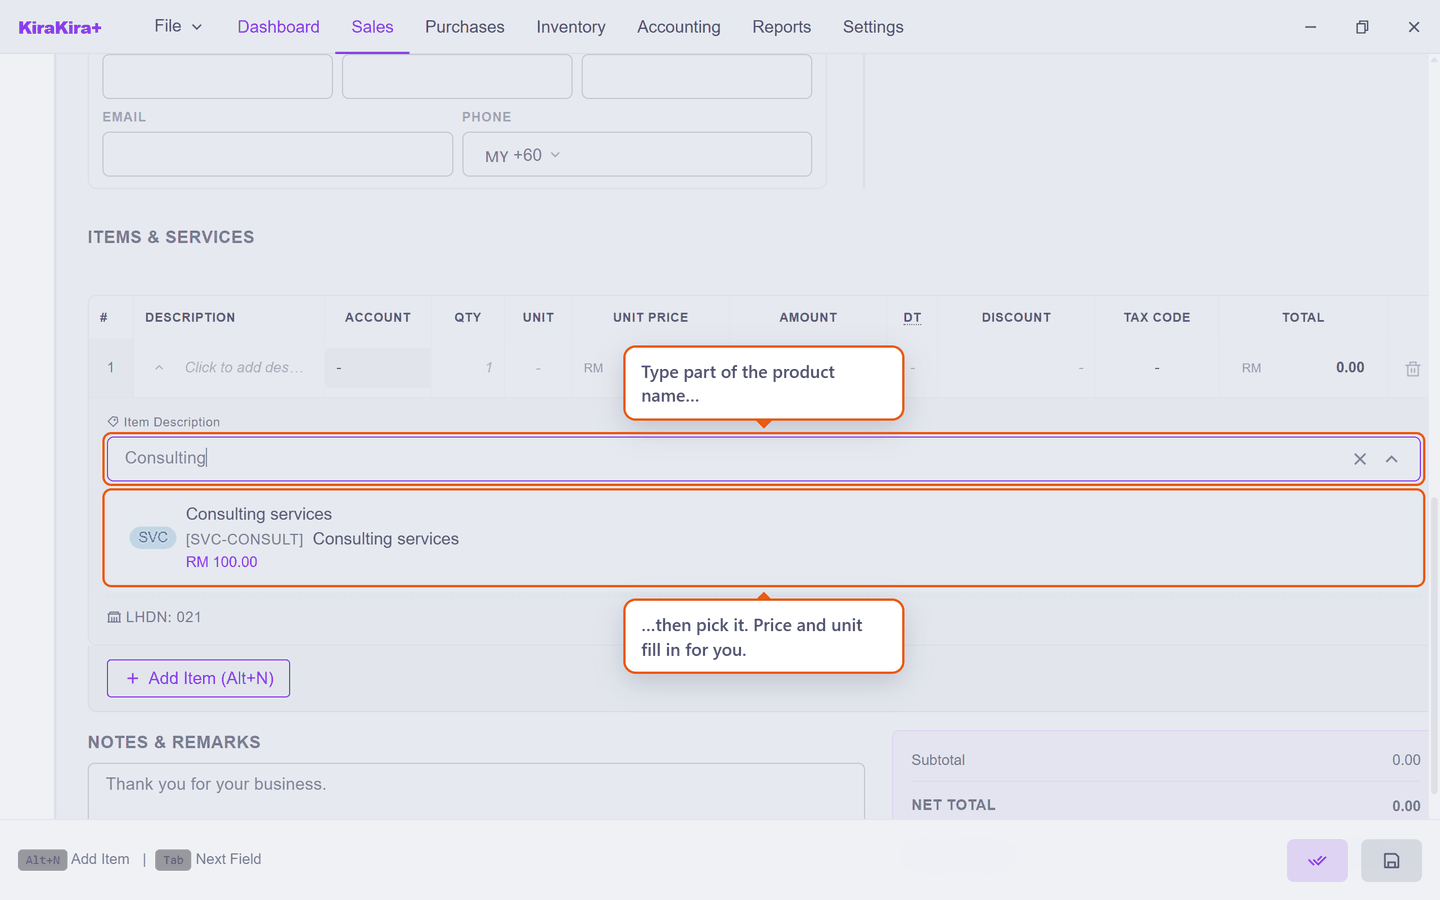
The description, price, and unit fill in from your product. Set Qty if it is more than one.
Two boxes to finish: each line needs an Account (which income account the sale belongs to — usually Sales) and a Tax Code. Click the cell and choose from the list. If you are not SST-registered, choose the exempt/zero code.
The Grand Total updates at the top right as you type.
4. Save it as a draft
Click the save button at the bottom right (the disc icon).
Your invoice is now a Draft: it is stored in your workspace, it has no official number yet, and it does not appear in your accounts. Drafts are safe to change or delete — nothing has been committed.
5. Finalise it
When the invoice is correct, click Finalise (the double-tick button beside save).
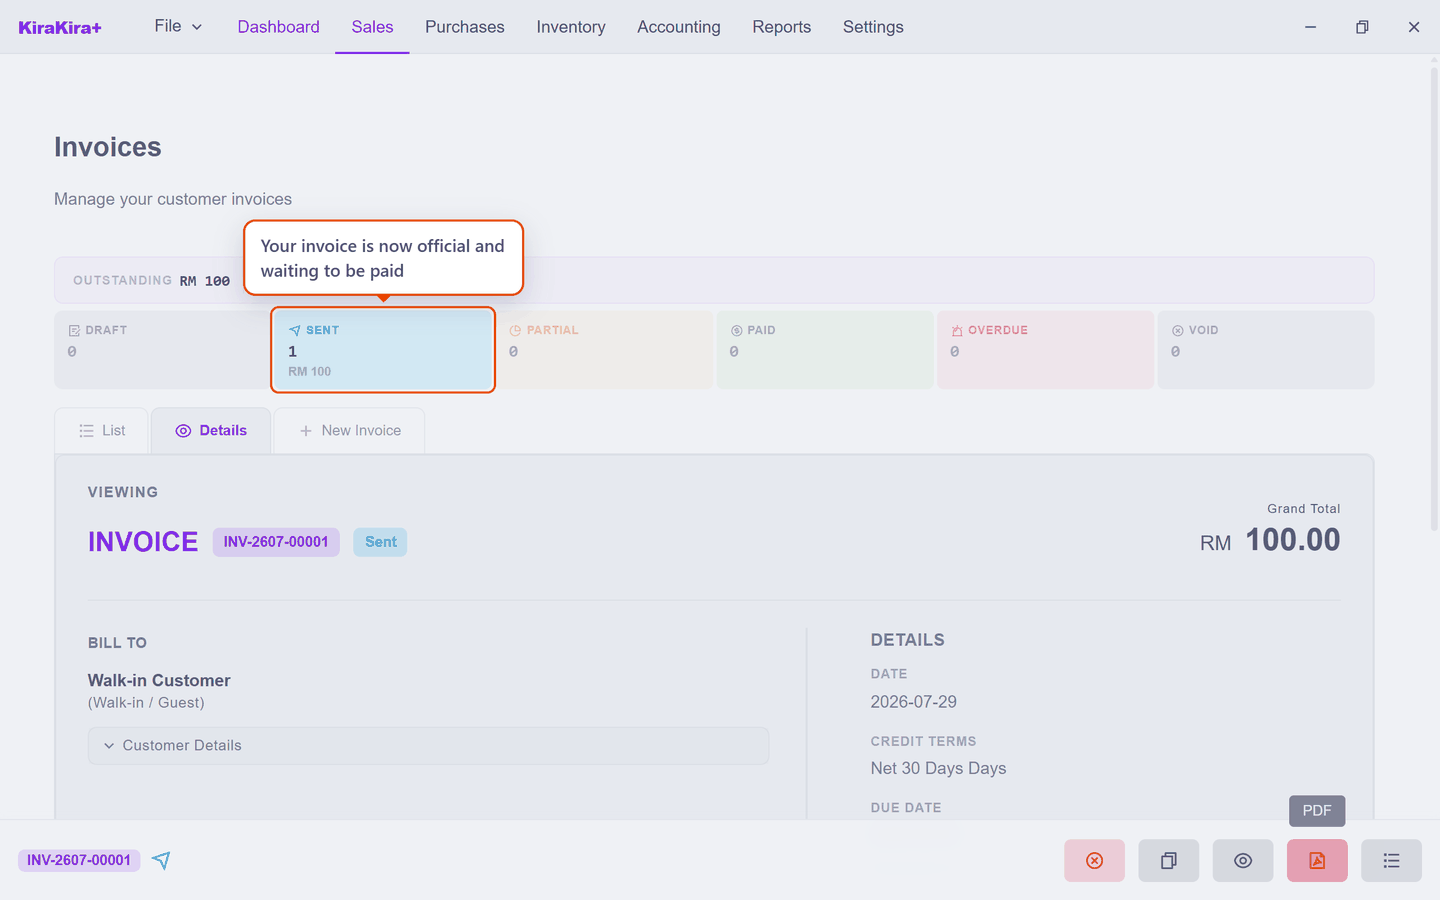
That is the moment the invoice becomes real:
- it gets its official number, such as
INV-2607-00001 - the amount appears in Receivables — money your customer now owes you
- the bookkeeping entries are posted for you
Finalising is meant to be permanent
A finalised invoice is an official document, so it cannot simply be edited. If something is wrong you either void it or issue a Credit Note — both leave a proper trail, which is what an auditor expects. Check the figures before you click.
What next?
Give it to the customer — print it or save the PDF from the invoice screen. Then carry on through the quick start; each piece takes a few minutes:
| Next | What it covers |
|---|---|
| Record a payment you received | Moves the invoice from Sent to Paid — the other half of getting paid |
| Enter your first supplier bill | The buying side: what you owe |
| Pay a supplier | Settles that bill — the mirror image of a receipt |
| Put something into stock | Only if you sell goods you count |
| See how the business is doing | Profit & Loss, and who owes you |
And save your work — keep a backup copy somewhere other than your computer.